Ball Jointed Doll Makeover

All about my doll makeover, makeup, repaint, ooak, dress, accessories

DIY and Crafts

Simple and easy DIY craft

Beautifull Places

Heaven On Earth! Some Travelling Story, Idea, Review, Tips

Culinary

Yuummm.. everyone love's foods. So here is culinary review from me, and some of super quick and easy recipe

Ball Jointed Doll Makeover

Because I LOVE Doll

Monday, December 30, 2013

Geo Xtra WT-A04 Brown ~ Review

Today I'm gonna review about one of my favourite lens, Geo Xtra WT-A04 Brown. I got this lens for free from my supplier, they offering me "buy 2 lens and get 1 free random lens". And this is what I got.. Geo Xtra WT-A04 Brown.

I got this free lens twice, because I buy the promo lens twice, and I got exactly same lens. Geo Xtra WT-A04 Brown normal 2 pairs. (i requested normal lens).


But its OK, because I loovveee this lens. Lens cycle 1 year, the diameter is 15mm, water content 38%, very comfort in my eyes and looks very natural.


The pattern is similiar with Geo Angel but this lens have triangle pattern, and bigger diameter (Geo Angel diameter is 14mm and Geo Super Angel diameter is 14,8mm)


The color is choco brown, but I think the pattern would'nt be clearly visible


This is the result in my eyes :


Bigger effect, looks very natural, perfect for you who wants a big natural eyes, the dolly eyes effect ^^


Geo lens is always comfortable to wear, this lens is comfortable to wear more than 5 hours.


I know this lens not so popular, its seems GEO didn't allocate enough budget to advertise this lens, but this lens is nice and comfort to use everyday. Similiar with Geo Angel Brown, but a little bit bigger and the color is more choco.

Thursday, December 26, 2013

Fimo Nail Art Tutorial

Today is tutorial time ^^
Its been a while since the last nail art tutorial, today I'm gonna explain about Basic Nail Art using Fimo

What you need is : Sliced Fimo, Nail Polish, Glue, Rhinestone (optional)


For glue, I'll explain about 3 kinds of glue, there are : Deco Glue / All Purpose Glue, Top Coat / Clear Nail Polish, Nail Glue.
 

- Deco Glue / All Purpose Glue : The result is long lasting, but need a long time to dry, it doesn't suit for nail art in your real nail
- Top Coat / Clear Nail Polish : The easy way to stick fimo into your nail, but its not long lasting
- Nail Glue : The result is long lasting, I recomended using nail glue. Make sure your fimo slice is as thin as possible.


First Steps : Color your nail with nail polish, I using fake nail because it easier for me to take a photos ^^


Second Steps : Wait until nail polish 100% dry, put glue in desired area, remember to wait a few seconds before attaching something on to glue


Thrid Steps : Attach fimo on glue area, press gently, until all fimo surface is completly stick on your nail, you can blow a little air using small fan, nail dryer, mini blow dryer to make it quickly dried.


Fourth Steps : Decorate with some rhinestones (you can skip this part if you don't have rhinestones), remember to wait a few seconds before attaching your rhinestones on to glue, too wet glue are gonna damage the bottom of rhinestones, and the rhinestones will loose the bling bling effect.


Wait until glue 100% dried, cover with Clear Nail Polish or Top Coat to make it shiny and long lasting (remember, don't put top coat on the top of rhinestone)
... And its done ^^

Tuesday, December 24, 2013

Merry Xmas Everyone


May the magic of Christmas brings you Happiness, Cheers and fun into your life Merry Christmas to you

Read more at: http://easyday.snydle.com/christmas-wishes.html | Easyday
May the magic of Christmas brings you Happiness, Cheers and fun into your life Merry Christmas to you

Read more at: http://easyday.snydle.com/christmas-wishes.html | Easyday
"May the magic of Christmas
brings you happiness, cheers and joy
into your life
Merry Christmas to you"


Hello Everyone...

I want to wish you Merry Christmas.. not only for people who celebrate it, but for everyone who read this post, may love, joy, and warmth of Christmas always be with you. Spread love to the world friends.. Happy Holiday ^^

Saturday, December 21, 2013

Holika Holika Magic Pole Mascara ~ Review


Today I'm gonna review about Holika Magic Pole Mascara, this item is one of the Holika Holika best seller products, so I'll give a try to this mascara.


The packaging is unique, outside box is purple triangle shaped box, and in the inside is also purple, with picture of shinning magic wand.
I choose no.1 Power Volume, because my eyelash is thin.


In the outside box, this Magic Pole Mascara claim that this mascara :
- Waterproof
- No panda eye (smudgeproof)
- Magic curling
- Strong black color


This is the inside of the Holika Magic Pole Mascara, the brush is very unique, I never found mascara brush like this. The upper part is round, like a magic wand.

I see there's a bit of fiber in mascara, fiber helps increase the volume on your eyelashes.


This is a picture of me wearing Magic Pole Mascara


Yes, I highly recommend this mascara, as they claims, this mascara is waterproof, no panda eyes, strong black color and add volume to my eyelashes.

Product Name : Holika Holika Magic Pole Mascara
Rating : 9/10
Recommended : Yes
This product can be purchased at MY SHOP

Tuesday, December 17, 2013

Holika Holika Miracle Skin Finish (Normal / Dry Skin) ~ Review

I saw a Miracle Skin Finish ads on the Holika Holika website, and I really like these ads, these ads starring by Bora, a member of the popular girlbands, The Sistar and also starred by Jung Il Woo one of the famous actor who starred in many drama series such as 49 Days, Take Care of the Young Lady, Flower Boy Ramyun Shop etc. Bora looks soo gorgeous like a fairy ^.^/


Miracle Skin Finish is one of the best seller items in MY SHOP, I'm curious about it, what is the special things about Holika Miracle Skin Finish. so I tried it..


The outside box of Miracle Skin Finish is very unique, there is a butterfly-shaped on the top of the box, its very pretty ^^


This is a packaging Miracle Skin Finish, a pink plastic jar. I chose Miracle Skin Finish for Normal / Dry Skin. For those who choose Miracle Skin Finish for Oily skin, the packaging is purple jar.


The contents of Miracle Skin Finish is white cream, with a delightful fragrance ^o^


Texture of Miracle Skin Finish creamy, let's try it on my hand...


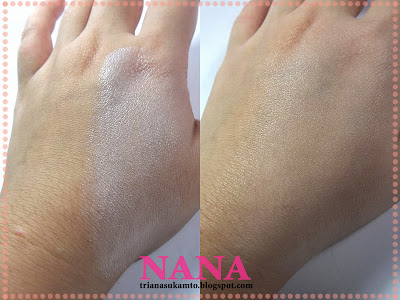
At the first time applied, the results will be very white, you must rubbed few times. After evenly on the skin, the result is almost like CC Cream, moisturizing the skin, brighten skin with natural results, the coverage is light, and there was a little glowing effect, probably because I chose Miracle Skin Finish for normal / dry skin.

This is Before - After Miracle Skin Finish :


Don't be afraid if the result is is too white, rub a few times then the result will be natural white on the skins.
I prefer to mix Miracle Skin Finish with BB Cream, the result will be natural white but covering my skins, not like wearing a mask and not thick. But if you want to just wear a Miracle Skin Finish, its OK. Because the Miracle Skin Finish already contains anti UV SPF25 PA++ to protect your skins from sunlight.


Product Name : Holika Holika Miracle Skin Finish (Normal / Dry Skin)
Rating : 9/10
Recommended : Yes
This product can be purchased at MY SHOP

Sunday, December 15, 2013

Wake Me Up When December Ends


I remember one of my friends said that in December, we should be careful because bad things usually happened.

Whether true or not, I have passed 3 times December with bad things.

This December also a hard things for me, two weeks had passed and I feel really stressed. I really want a long sleep and woke up in January

I saw the Christmas
preparation is everywhere and my heart feel so sad. I hope, really hope I can spend this Christmas with a joyful heart

Saturday, December 14, 2013

My Old Nail Art

Warning :  This Post Maybe Will Be Bandwidth Killer ( 26 pcs Image)

Inspired by the previous post about "Old Decoden", I made ​​a similar post about the "Old Nail Art". For flashback about nail art I've ever made

I like to color my nails with nail polish since I was at High School, after seeing the Japanese nail art magazine in 2007, I was surprised because there are so many variations of the Japanese Nail Art . Since then, I was started to learn nail art on my own.

This is first nail art I made, Gradation Color Nail Art by using glitter polish.


In 2008 I was joined the nail art forum in the largest communities forum in Indonesia, and I got the bullied by seniors there, my heart is very sad, but the good news is... I met my best friend. Her name is Jilz, she is feels sympathy for me because i got bullied by seniors, and then she contacted me, we talked a lot about everythings and we became a best friends since then 'till this day *hug*

I don't care anymore with that nail art forum, the important thing is.. I found my best friend, one sincere friend are better than 1000 fake friends ^ ^

Back to the original topic ..
I find cheap fake nails at a local accesories store, and decorate it with lace, ribbon and rhinestone.


This is the result of my first nail art painting using acrylic paint.


Nail art using lace and ribbons.


Some results of nail art using acrylic paints.


In the Decoden post i've said that i was attend in Clay Seminars, then I made ​​a small flowers and I put on the fake nails.


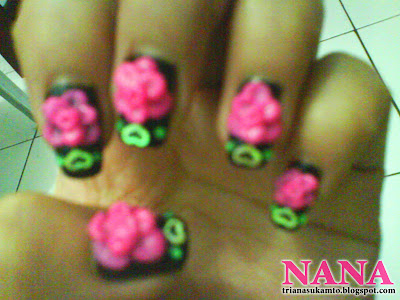
I saw the 3D acrylic nail art tutorial on Youtube and I really wanted to try it, then I bought acrylic nail art materials on Ebay. It was my first import experience, luckily the seller was very patient answering my newbie questions hahaha. And here's the results of my first 3D acrlylic flowers.


This Nail Art theme is "Cool Love" hahaha


Simple French manicure


Spring sakura flower with my photo in 2008, no makeup + low resolution camera >.<


Nail art using dazzling (look at my face, I'm trying to be sexy here) hahaha


Purple glitter + white 3D flower + shy smile >.<


I really love this nail art, the colors is sharp, unfortunately I didn't have a camera with good quality.


Gradation nail with a sponge and blinged it with glitter top coat.


French nail + rhinestone in 2009 (I borrow my sister digicam, so the photo quality is better)


First time I using Fimo nail art (my nails feel so fresh and juicy) hahaha


Gradation nail using a sponge, and decorated with dazzling too


So sweet!! I really love this nail ^^


In 2010, This is the moment when I finally decided to selling Nail Art materials. This nail art using 3D sticker that I sells in MY SHOP at that time.


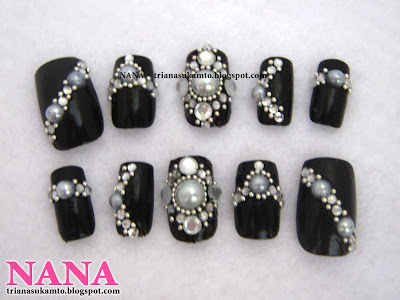
I used to be made customized nail art too, but I don't have enough time to made it now, this is several nail art I made for my customers :


The last nail art I created at 2011, already passed 2 years, and I've never made nail art anymore, but I still sell nail art materials in MY SHOP


Twitter Delicious Facebook Digg Stumbleupon Favorites More