
Today is tutorial time ^^
Its been a while since the last nail art tutorial, today I'm gonna explain about Basic Nail Art using Fimo
What you need is : Sliced Fimo, Nail Polish, Glue, Rhinestone (optional)

For glue, I'll explain about 3 kinds of glue, there are : Deco Glue / All Purpose Glue, Top Coat / Clear Nail Polish, Nail Glue.
- Deco Glue / All Purpose Glue : The result is long lasting, but need a long time to dry, it doesn't suit for nail art in your real nail
- Top Coat / Clear Nail Polish : The easy way to stick fimo into your nail, but its not long lasting
- Nail Glue : The result is long lasting, I recomended using nail glue. Make sure your fimo slice is as thin as possible.

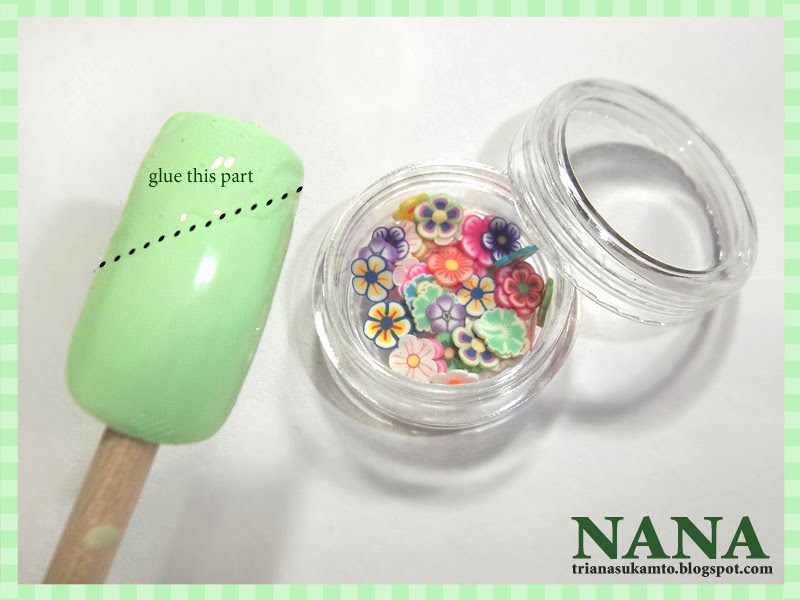
First Steps : Color your nail with nail polish, I using fake nail because it easier for me to take a photos ^^

Second Steps : Wait until nail polish 100% dry, put glue in desired area, remember to wait a few seconds before attaching something on to glue
Thrid Steps : Attach fimo on glue area, press gently, until all fimo surface is completly stick on your nail, you can blow a little air using small fan, nail dryer, mini blow dryer to make it quickly dried.

Fourth Steps : Decorate with some rhinestones (you can skip this part if you don't have rhinestones), remember to wait a few seconds before attaching your rhinestones on to glue, too wet glue are gonna damage the bottom of rhinestones, and the rhinestones will loose the bling bling effect.

Wait until glue 100% dried, cover with Clear Nail Polish or Top Coat to make it shiny and long lasting (remember, don't put top coat on the top of rhinestone)
... And its done ^^


0 comments:
Post a Comment